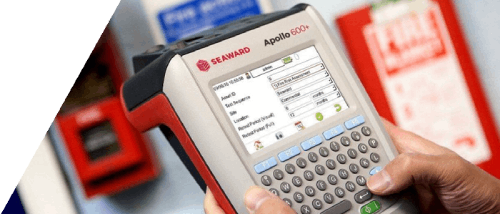
How to upload your company logo onto the Apollo 500+?
The following document is intended to be a troubleshooting guide to ensure you are uploading a company logo to your Apollo in the correct manner (you cannot load a Company Logo to the Apollo 400). Please check all aspects of this before contacting the technical support helpline.
1. Please register your Apollo to receive an additional 12 months warranty plus full access to Product Support. You can do this at www.seaward.com/warranty24 or by completing the form in the “Care and Support” card and returning by post.
2. Please ensure your Apollo has the latest firmware installed, to do this please see the following link: www.seaward.com/apollo-series-firmware
3. Create your logo ensuring it is a .bmp (bitmap image), it is black and white (monochrome - 1 bit depth), has maximum image dimensions of 320 pixels by 240 pixels and has a maximum file size of approximately 15,000 Bytes (15KB).
4. On the Apollo “Home Screen” ![]() select menu/options, function key “F4”.
select menu/options, function key “F4”. ![]()
5. In the menu select “Upload” by using the arrow keys or selecting, key number “7”. ![]()
6. In the “Upload data into Apollo” field select “Printer Logos”, using the arrow keys to select from the dropdown menu.![]()
7. In the “using:-” field select “ USB-PC cable” (Apollo 500 or 600)
or
In the “using:-” field select “![]() Flash Memory Stick” (Apollo 600 only)
Flash Memory Stick” (Apollo 600 only)
8. An additional Apollo drive (for example Apollo E:) will appear on your PC. Transfer your bitmap image to this drive using “Windows Explorer” and when complete select the function key “F3” ![]() . In field below “Valid data files from PC. Select one of these files and press F4” - select the file containing your newly created logo, using the arrows keys, and save by selecting “F4”
. In field below “Valid data files from PC. Select one of these files and press F4” - select the file containing your newly created logo, using the arrows keys, and save by selecting “F4” ![]() (USB-PC cable, Apollo 500 or 600)
(USB-PC cable, Apollo 500 or 600)
or
In the field below “Valid data files from USB memory stick. Select one of these files and press F4” - select the file containing your newly created logo, using the arrows keys, and save by selecting “F4” ![]() (Flash Memory Stick, Apollo 600 only)
(Flash Memory Stick, Apollo 600 only)
Note: When selecting one from multiple files please ensure the correct file is highlight.
9. When the file is successfully uploaded “New printer logos installed OK” will appear above the file name.
10. Return to the main menu using function key “F5”. ![]()
11. Select “View Data”, by selecting number “1” ![]()
Note: You will require test data to be already stored on the instrument to do this.
12. Select an asset using the arrow keys and function key “F4”. ![]()
13. Select a full test result using “F4” again to display the “Test Details” for the asset.
14. Select menu/options, function key “F4”, to display the “Test Results Option”. ![]()
15. Highlight and select “Print Label” using the arrow keys and function key “F4”. ![]()
16. A virtual image of the current label is shown on the instrument and other label formats can be selected using function key “F3”. ![]()
17. To select the logo that was uploaded use the tools function key “F2”. ![]()
18. Using the arrow keys, select either the “Pass Logo” or “Fail Logo” field, the uploaded logo should be available for selection. After highlighting the required logo, ensure you select the correct “Printer” and then save this setting by using function key “F3”. ![]()
19. Your logo should now appear on the instrument, as a virtual label image, and is ready to be printed. Alternative versions of the label can be selected using the function key “F3” ![]()

I'd like to talk to a sales advisor


Sign up to our Newsletter.
Stay up to date with the latest industry and product news, as well as our free educational content such as webinars and our expert guides.
Close