How to download the Apollo 600+ into PATGuard 3?
The following document is intended to be a troubleshooting guide to ensure you are downloading your Apollo in the correct manner.
1. Please register your Apollo to receive an additional 12 months warranty plus full access to Product Support, you can do this at www.seaward.com/register
2. Please ensure your Apollo has the latest firmware installed, to do this please see the following link: www.seaward.com/apolloplus
On the Apollo+
3. On the Apollo+ “Home Screen” ![]() select menu/options, function key “F4”.
select menu/options, function key “F4”. ![]()
4. In the menu select “Download” by using the arrow keys or selecting, key number “5”. ![]()
5. In the “Download from Apollo” field select “To PATGuard 3”, using the arrow keys to select from the dropdown menu.
(a) In the “using:-” field select “ ![]() USB-PC cable” (for the Apollo+ Series).
USB-PC cable” (for the Apollo+ Series).
or
(b) In the “using:-” field select “ ![]() Flash Memory Stick” (Apollo 600+ only).
Flash Memory Stick” (Apollo 600+ only).
6. Ensure a filename is in the “Filename” field.
(a) Connect the USB lead between the PC and Apollo (for the Apollo+ Series).
or
(b) You will be prompted to “Insert USB memory stick….” any data on this memory stick will be displayed in the bottom box (Apollo 600+ only).
7. You now have a choice of either downloading all data “F4” ![]() or filtering by selecting “F2”.
or filtering by selecting “F2”. ![]() .
.
Note: If filtering the data, select the filters you wish to apply using the arrow keys and press accept “F4”.
8. The download is complete after the blue bar reaches 100% and either:-
(a) the file appears in an additional Apollo drive (for example Apollo E:) that will now appear on your PC. This can be viewed using “Windows Explorer” (for the Apollo+ Series).
(b) the file appears on the memory stick, remove the memory stick from the Apollo and transfer it to the PC (Apollo 600+ only).
In PATGuard 3
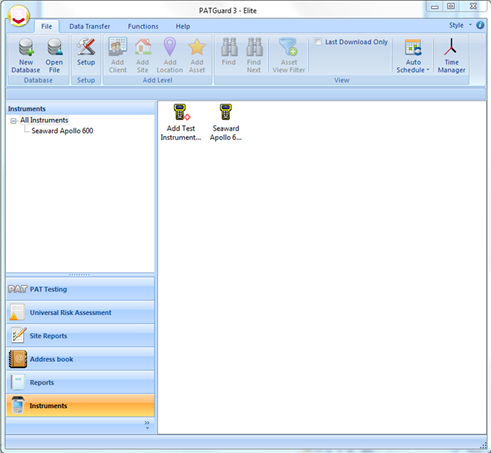
9. Open PATGuard 3 on your PC. If you already have a database open you are ready to download, if not, you will need to either open a file (database) or create a new database.
10. In an open PATGuard 3 database select “Instruments” and then “Add a Test Instrument” using the icon – select your instrument name using the dropdown and enter the instrument serial number.
11. Select “Data Transfer” and “Download from Tester”, if you receive a message “Error: Unable to detect an available com port”, click to accept.
12. Select your instrument from the dropdown box and
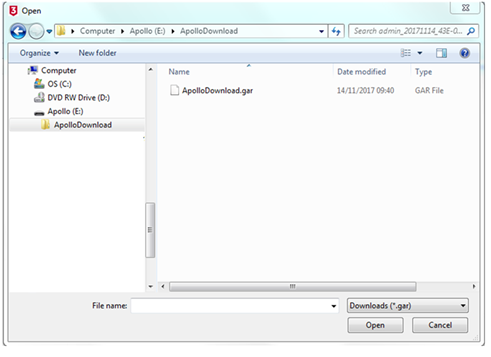
(a) browse for the *.gar file in the Apollo drive. Select “open”, then “OK” and your downloaded data should appear in the PATGuard 3 database (for the Apollo+ Series).
(b) browse for the *.gar file on the flash memory stick. Select “open”, then “OK” and your downloaded data should appear in the PATGuard 3 database (Apollo 600+ only).

I'd like to talk to a sales advisor


Sign up to our Newsletter.
Stay up to date with the latest industry and product news, as well as our free educational content such as webinars and our expert guides.
Close